How to deploy Rails with Kamal and SSL certificate on any VPS

Guillaume Briday
7 minutes
Kamal is a tool to help you deploy your Web applications anywhere in the cloud or your own machines with Docker.
To quote their headline:
Kamal offers zero-downtime deploys, rolling restarts, asset bridging, remote builds, accessory service management, and everything else you need to deploy and manage your web app in production with Docker. Originally built for Rails apps, Kamal will work with any type of web app that can be containerized.

I have recently deployed and migrate multiple applications from PaaS like Heroku and Scalingo, that can become really expensive for what it is, to simple and cheap VPS like Scaleway or DigitalOcean without losing the stability and simplicity thanks to Kamal.
I suggest you to read their vision section on their homepage because it explains really well the philosophy behind it.
So here is what I learned and how to do it.
In this blog post, we will see how to:
- Deploy Rails on Docker with Kamal
- Persist a SQLite database on production
- Configure your DNS
- Configure Traefik to generate SSL certificate automatically
- Configure and secure your server
1. Install Kamal
Kamal comes as a Ruby Gem:
$ gem install kamalor if you have a Ruby app, you can add it to your Gemfile:
$ bundle add kamalAnd check if it's installed correctly:
$ kamal version2. Prepare the configuration files
$ kamal initThis command will create at least two important files, .env and config/deploy.yml.
The first one is pretty straightforward. This is where you will set most of your environment variables that will be pushed to your servers.
The second is where your Kamal configuration live.
If you use the default Docker Hub, the KAMAL_REGISTRY_PASSWORD in your .env must be a token, not your actual password.
See: https://docs.docker.com/security/for-developers/access-tokens/ for more information.
The most important file, config/deploy.yml:
# Name of your application. Used to uniquely configure containers.
service: rails-hotwire

# Name of the container image.
image: guillaumebriday/rails-hotwire

# Deploy to these servers.
servers:
  web:
    hosts: # We can have as many servers as you want
      - 192.168.0.1
      - 192.168.0.2
      - ...
    labels:
      # We will detail this part later...

# Credentials for your image host.
registry:
  # Specify the registry server, if you're not using Docker Hub
  # server: registry.digitalocean.com / ghcr.io / ...
  username: guillaumebriday

  # Always use an access token rather than real password when possible.
  password:
    - KAMAL_REGISTRY_PASSWORD # Must be present in your `.env`.

# Inject ENV variables into containers (secrets come from .env).
# Remember to run `kamal env push` after making changes!
env:
  clear:
    RUBY_YJIT_ENABLE: 1
    RAILS_SERVE_STATIC_FILES: true
  secret:
    - RAILS_MASTER_KEY

volumes:
  - "data:/rails/data" # Use Docker volume to keep SQLite database on disk between deploys.

# Configure custom arguments for Traefik
traefik:
  # We will detail this part later...
Note that I use named volume data that is bound to /rails/data in the container and in my case this is where I have my SQLite production database configured in my config/database.yml file:
default: &default
  adapter: sqlite3
  pool: <%= ENV.fetch("RAILS_MAX_THREADS") { 5 } %>
  timeout: 5000

production:
  <<: *default
  database: data/production_rails_hotwire.sqlite3 # Saved in the folder `data`
If you have any data that you want to persist between each deployment, you will have to use Docker volumes!
3. Prepare your DNS
If you plan to have multiple apps with subdomains on the same server, you can use a CNAME instead of multiple A records. So one day, if you want to change your server location or your load balancer, you will have to change it only in one place.
You have two options, either you want to use only specific subdomains or all of them.
If you want to use specific subdomains:
modern-datatables 86400 IN A 192.168.0.1 ; Generic subdomain name for this server.
rails-hotwire 86400 IN CNAME modern-datatables.guillaumebriday.fr. ; Specific domain for our app.
rails-vuejs 86400 IN CNAME modern-datatables.guillaumebriday.fr. ; Specific domain for our app.
If you want to redirect all subdomains:
@ 86400 IN A 192.168.0.1 ; Main record for the top level domain
* 86400 IN CNAME guillaumebriday.fr. ; Record for all subdomains
More information here (in 🇫🇷): Gérer ses DNS pour un reverse-proxy.
4. Configure Traefik for SSL and HTTPS
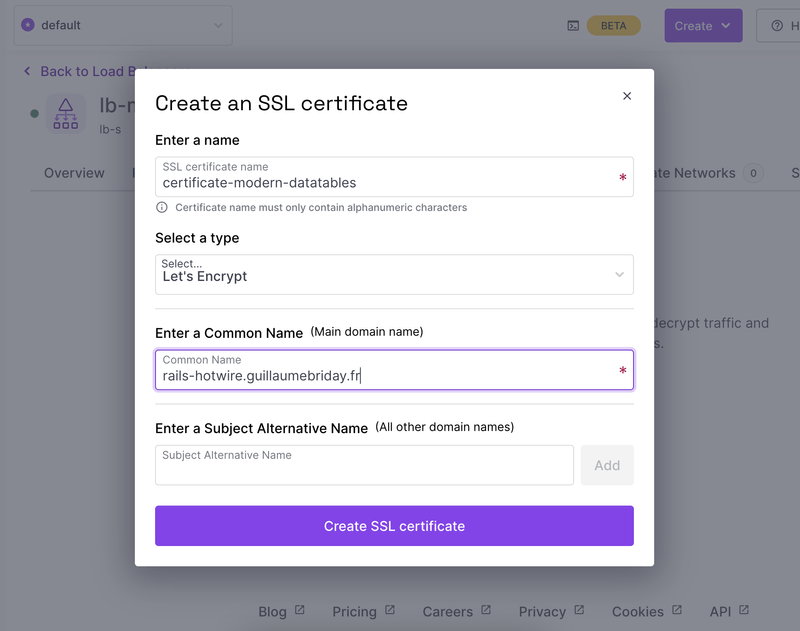
This is the most important section. We need to configure Traefik so it can create a SSL certificate automatically for us.
You can find all the options available on the official documentation.
But here is what I use to make it works, in your: config/deploy.yml file, you should have something like that:
# Deploy to these servers.
servers:
  web: # Use a named role, so it can be used as entrypoint by Traefik
    hosts:
      - 192.168.0.1
    labels:
      traefik.http.routers.blog.entrypoints: websecure
      traefik.http.routers.blog.rule: Host(`example.com`)
      traefik.http.routers.blog.tls.certresolver: letsencrypt

# Configure custom arguments for Traefik
traefik:
  options:
    publish:
      - "443:443"
    volume:
      - "/letsencrypt/acme.json:/letsencrypt/acme.json" # To save the configuration file.
  args:
    entryPoints.web.address: ":80"
    entryPoints.websecure.address: ":443"
    entryPoints.web.http.redirections.entryPoint.to: websecure # We want to force https
    entryPoints.web.http.redirections.entryPoint.scheme: https
    entryPoints.web.http.redirections.entrypoint.permanent: true
    certificatesResolvers.letsencrypt.acme.email: "[email protected]"
    certificatesResolvers.letsencrypt.acme.storage: "/letsencrypt/acme.json" # Must match the path in `volume`
    certificatesResolvers.letsencrypt.acme.httpchallenge: true
    certificatesResolvers.letsencrypt.acme.httpchallenge.entrypoint: web # Must match the role in `servers`
On your server, we have to create the file that Traefik will use for certificates storage:
$ mkdir -p /letsencrypt &&
  touch /letsencrypt/acme.json &&
  chmod 600 /letsencrypt/acme.json
Once you are done, restart the Traefik container:
$ kamal traefik reboot5. Prepare your Dockerfile
Here is an example of a Dockerfile that you can use in your Rails project.
Note that if you're creating a Rails project on 7.1 or greater, it is already included.
Don't forget to adapt the file according to your needs.
For instance, you might not need node or sqlite but you might want to install postgresql.
The Dockerfile file should be at the root level of your project by default.
# syntax = docker/dockerfile:1
# Make sure RUBY_VERSION matches the Ruby version in .ruby-version and Gemfile
ARG RUBY_VERSION=3.2.2
FROM registry.docker.com/library/ruby:$RUBY_VERSION-slim as base
# Rails app lives here
WORKDIR /rails
# Set production environment
ENV RAILS_ENV="production" \
BUNDLE_DEPLOYMENT="1" \
BUNDLE_PATH="/usr/local/bundle" \
BUNDLE_WITHOUT="development"
# Throw-away build stage to reduce size of final image
FROM base as build
# Install packages needed to build gems and node modules
RUN apt-get update -qq && \
apt-get install --no-install-recommends -y build-essential curl git libvips node-gyp pkg-config python-is-python3
# Install JavaScript dependencies
ARG NODE_VERSION=18.18.2
ARG YARN_VERSION=1.22.19
ENV PATH=/usr/local/node/bin:$PATH
RUN curl -sL https://github.com/nodenv/node-build/archive/master.tar.gz | tar xz -C /tmp/ && \
/tmp/node-build-master/bin/node-build "${NODE_VERSION}" /usr/local/node && \
npm install -g yarn@$YARN_VERSION && \
rm -rf /tmp/node-build-master
# Install application gems
COPY Gemfile Gemfile.lock ./
RUN bundle install && \
rm -rf ~/.bundle/ "${BUNDLE_PATH}"/ruby/*/cache "${BUNDLE_PATH}"/ruby/*/bundler/gems/*/.git && \
bundle exec bootsnap precompile --gemfile
# Install node modules
COPY package.json yarn.lock ./
RUN yarn install --frozen-lockfile
# Copy application code
COPY . .
# Precompile bootsnap code for faster boot times
RUN bundle exec bootsnap precompile app/ lib/
# Precompiling assets for production without requiring secret RAILS_MASTER_KEY
RUN SECRET_KEY_BASE_DUMMY=1 ./bin/rails assets:precompile
# Final stage for app image
FROM base
# Install packages needed for deployment
RUN apt-get update -qq && \
apt-get install --no-install-recommends -y curl libsqlite3-0 libvips && \
rm -rf /var/lib/apt/lists /var/cache/apt/archives
# Copy built artifacts: gems, application
COPY /usr/local/bundle /usr/local/bundle
COPY /rails /rails
# Run and own only the runtime files as a non-root user for security
RUN useradd rails --create-home --shell /bin/bash && \
chown -R rails:rails db log storage tmp
USER rails:rails
# Entrypoint prepares the database.
ENTRYPOINT ["/rails/bin/docker-entrypoint"]
# Start the server by default, this can be overwritten at runtime
EXPOSE 3000
CMD ["./bin/rails", "server"]And here is the default docker-entrypoint, that should be located at bin/docker-entrypoint without extension:
#!/bin/bash -e

# If running the rails server then create or migrate existing database
if [ "${1}" == "./bin/rails" ] && [ "${2}" == "server" ]; then
  ./bin/rails db:prepare
fi

exec "${@}"
Kamal will build, push and pull the Docker image automatically, that is why it needs your credentials to connect to the registry server.
⚠️ You don't it to build the image and publish it yourself.
6. Prepare your server
With Kamal, everything happen in Docker, so theoretically you don't anything more installed on your server. Also Kamal will automatically install Docker for you.
But if you have just created a new server, you probably want to configure basic security rules and better default config.
To automate these actions, I created an Ansible playbook so you don't have to run every command manually, it's especially handy if you deploy your app on multiple servers with load balancing.
You can follow the instructions here if you are interested: 👉 Kamal Ansible Manager
Basically, it will upgrade already installed packages and install the UFW Firewall, Fail2ban and NTP.
7. First deploy
Now we are ready to deploy our app for the first time, but before we need to setup Kamal:
$ kamal setupBasically, this command will:
- Install Docker if it's not already installed.
- Start and configure the Traefik container.
- Load all your environment variables present in your
.envfile. - Build and push your Docker image to the registry.
- Start a new container with the version of the app.
8. Workflow
Now that everything should be up and running!
Here are the most basic commands you will need on a daily basis.
If you want to deploy a new version of your app:
$ kamal deployIf you want to update your environment variables:
$ kamal env pushTo start a bash session in a new container made from the most recent app image:
$ kamal app exec -i bashTo start a Rails console in a new container made from the most recent app image:
$ kamal app exec -i 'bin/rails console'See your logs:
$ kamal app logs9. Last comment
Note that if you deploy your application on multiple servers automatically with Kamal, the Traefik configuration presented here becomes irrelevant, because you will need a load balancer, the rest stays the same though.
In this case, you should refer to your DNS and Load Balancer provider like Scaleway Load Balancer or Cloudflare Load Balancing that will automatically manage the SSL certificate for you.
But in most cases, deploying your app on one server only will be more than enough.

10. Conclusion
It's easy as that, enjoy your reliable and cheap deploy! 🚀
📢 This post is part of a series on Kamal
- Easy, Perfect for side/small projects: How to deploy Rails with Kamal and SSL certificate on any VPS
- Medium: Perfect for most projects: How to deploy Rails with Kamal, PostgreSQL, Sidekiq and Backups on a single host
- Expert: Perfect for big projects: How to Deploy and Scale your Rails application with Kamal

