Capistrano: Automatically deploy Laravel with Docker

Guillaume Briday
3 minutes

This article is the second part of our step-by-step project deployment series. This time, we’ll automate the deployment process using Capistrano and Docker-compose.
You can find the server setup in the previous article: Ansible: Automating Server Installation.
Introduction
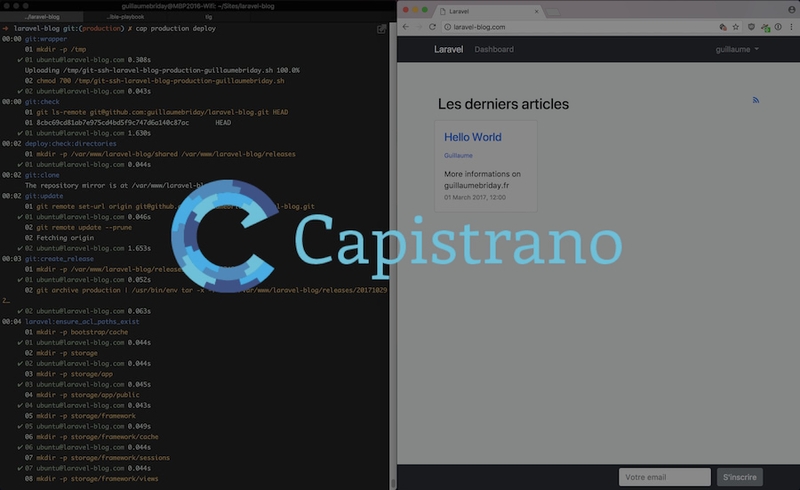
Capistrano is a tool written in Ruby that allows you to automate deployment scripts. In simple terms, it enables easy and automatic deployment of applications into production.
While it is primarily used for deploying Ruby applications, it can handle any language. Like Ansible, Capistrano executes commands on your server. For each deployment, Capistrano creates a release of your project, allowing you to easily roll back to a previous state with a single command and minimizing downtime between deployments—or eliminating it altogether.
For this example, we will deploy my project laravel-blog, which is a PHP Laravel project running in Docker containers.
How to install Capistrano
To install Capistrano, you’ll need two tools:
Once installed on your host, create a Gemfile at your project root to download Ruby dependencies:
group :development do
  gem "capistrano", "~> 3.10"
end
Then install Capistrano on your host with Bundler:
$ bundle installInstead of manually writing the necessary Capistrano files, you can use a command to generate basic files, which you can modify later:
$ bundle exec cap installNow that the files are ready, let’s take a closer look at how it works.
General structure
Capistrano generates two folders with several files: config/deploy and lib/capistrano, along with a deploy.rb file in the config folder.
├── Capfile
├── config
│   ├── deploy
│   │   ├── production.rb
│   │   └── staging.rb
│   └── deploy.rb
└── lib
    └── capistrano
        └── tasks
The Capfile loads Capistrano dependencies.
The deploy.rb file is where default deployment variables are configured.
In the config/deploy folder, there is one file per environment. Capistrano supports deploying multiple states of your project to different servers. For example, you could have a staging and a production environment on the same server with Nginx. Each environment has specific information and commands for deployment.
In the lib/capistrano folder, you can define optional tasks to organize and separate actions for better readability, similar to Ansible’s roles.
Default configuration
Let’s start by defining some key variables in config/deploy.rb. Four default variables need customization:
set :application, 'laravel-blog'
set :repo_url, '[email protected]:guillaumebriday/laravel-blog.git'
set :branch, :master
set :deploy_to, '/var/www/laravel-blog'
These variables are self-explanatory, but some additional context is important.
You can override these variables in the specific environment files. For example, in staging, you might deploy the develop branch instead of master.
Capistrano requires authentication at two levels: between your machine and the server, and between the server and the remote repository.
Refer to my article on connecting via SSH if you’re unfamiliar with it.
For server-to-repository access, two options are available:
- Generate an SSH key on the server and link it to your repository.
- Use SSH Agent Forwarding, as explained in Capistrano’s documentation. This lets the server use your local SSH key, simplifying the process.
Next, specify the application location on the server using the deploy_to variable. It defaults to /var/www/my_app_name but can be set to any accessible directory.
Add three Laravel-specific variables for deployment:
# Path to the dotenv file
set :dotenv, '/var/www/.env'

# Path to the docker-compose.yml file
set :docker_compose, '/var/www/docker-compose.yml'

# Paths for Laravel 5 application ACLs
set :laravel_acl_paths, [
  'bootstrap/cache',
  'storage',
  'storage/app',
  'storage/app/public',
  'storage/framework',
  'storage/framework/cache',
  'storage/framework/sessions',
  'storage/framework/views',
  'storage/logs'
]
The dotenv and docker_compose files were generated with Ansible templates in the previous article.
Production environment
For this article, I’ll focus on the production environment. The process is similar for staging.
The config/deploy/production.rb file is straightforward:
server 'laravel-blog.com', user: 'ubuntu', roles: %w{app db web}

after 'deploy:updated', 'docker:compose'
after 'deploy:updated', 'docker:build'
after 'deploy:updated', 'laravel:resolve_acl_paths'
after 'deploy:updated', 'laravel:ensure_acl_paths_exist'
after 'deploy:updated', 'composer:install'
after 'deploy:updated', 'node:install'
after 'deploy:updated', 'node:build'
after 'deploy:updated', 'laravel:env'
after 'deploy:updated', 'docker:down'
after 'deploy:updated', 'laravel:migrate'
after 'deploy:updated', 'laravel:seeds'
after 'deploy:updated', 'docker:up'
The first line specifies the server and user for SSH connection. The roles filter tasks based on environment.
Tasks
Capistrano provides hooks in the deployment flow, allowing you to execute actions at specific points.
Here’s an example of a task for database migrations:
# lib/capistrano/tasks/laravel.rb

namespace :laravel do
  desc 'Run migrations'
  task :migrate do
    on roles(:app) do
      within release_path do
        execute 'docker-compose', :run, 'blog-server', 'php artisan migrate --force'
      end
    end
  end
end
The laravel:migrate task runs migrations on servers with the app role. It uses the release_path to execute the necessary command.
Finally, deploy to production with:
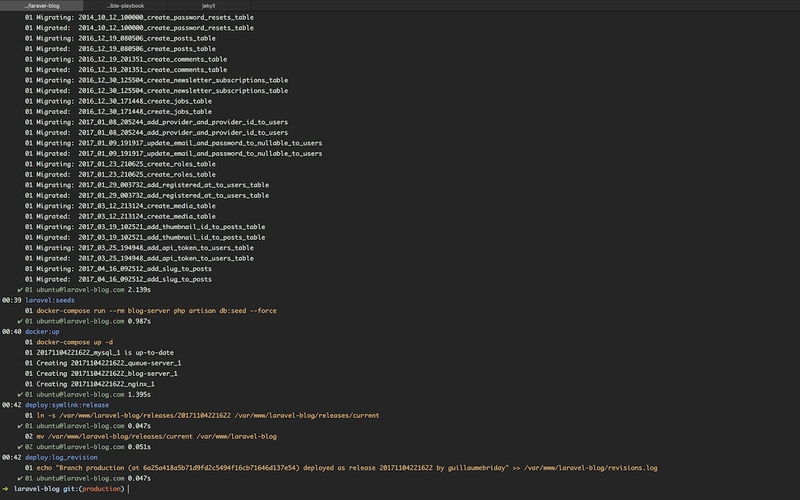
$ cap production deployIf successful, you’ll see a deployment summary:

Conclusion
If you’re new to Capistrano, I hope this article clarifies its functionality.
Feel free to leave suggestions or questions in the comments!
Thank you!

