Laravel & Vue.js - Building a Todo list, Part 7: Managing tasks with Vuex and Axios

Guillaume Briday
8 minutes

We have reached the heart of the application: task management. This is the central part of the project and the most important for end users. I've gone through several iterations on the design and functionality to produce a first version that satisfies me, which I will present in this article.
Introduction
To manage the tasks, I will use three com ponents, each with a specific role.
One component to manage a task, another to list all tasks, and a third to create a creation form.
The advantage of using Vuex in our application is that there will be only one source of truth for managing our tasks. This means that the three components will communicate with Vuex for all the actions they are responsible for.
Thus, for example, when a task is added via the TaskForm component, it will update the Vuex store, and thanks to Vue's reactivity, the TaskList component will automatically display the new task alongside the others. We will see all this in detail in the rest of the article.
We then encounter this major concept of Vuex:

The components will not have to manage states directly but will use the actions available in the Vuex modules that we will write to modify its state and thus update the different views.
Without this, we would have had to use Vue's Events to manage interactions between the different components. We would then have lost the notion of a single source of truth and would have the same business logic written in two different places.
For me, it is essential to use a State Manager like Vuex in a complex application with a unique Store for all our components when you have data to share between them. It will manage the state and possible interactions with the data in a single place by applying the notion of separation of concerns.
Router configuration
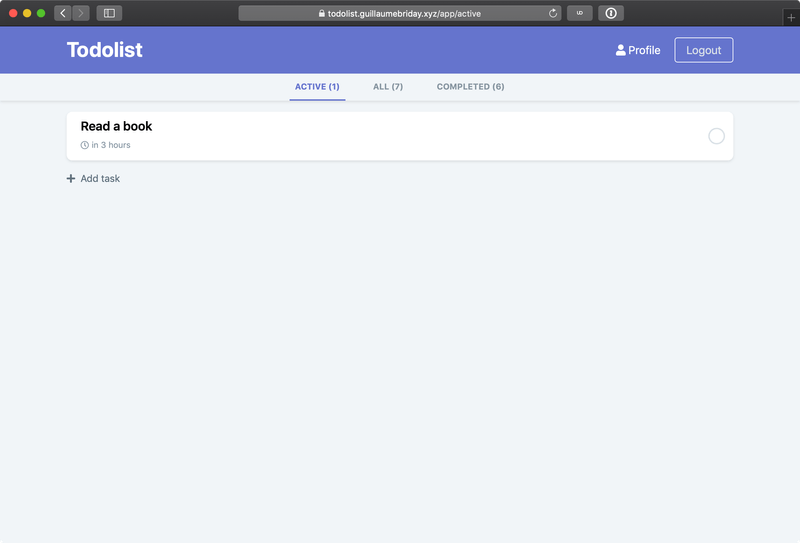
To start, we will add a single route declaration to our router with a particular pattern to manage the status of tasks. For example, I want /app/active/ to display only the active tasks, /app/completed to display only the completed tasks, and so on.
I will not create three routes with three different components but will use the status returned by the Vue Router to filter tasks based on the URL. This will allow the user to save the URL of their choice to display tasks filtered as they wish.
In my list of routes, I add:
{
  path: '/app/:status',
  name: 'TaskList',
  component: TaskList,
  meta: { auth: true },
},
:status is a dynamic segment. It can take any value, and this route will then use TaskList to manage the display regardless of the status in the URL.
I can then retrieve the value of :status anywhere in my application via this.$route.params.status.
We will then be able to create our Vuex store to manage the business rules of our tasks.
A Vuex module to manage our tasks
I will move the modules into a subfolder store/modules for better coherence.
Thus, I will have a file store/modules/tasks.js with this default structure that we will complete:
import axios from "axios"

const state = {
  tasks: [],
  endpoint: "/tasks/",
}

const mutations = {
  //
}

const getters = {
  //
}

const actions = {
  //
}

export default {
  state,
  mutations,
  getters,
  actions,
}
Don't forget to import it into the Vuex modules as well.
State
Our state will contain only two pieces of information: an array of tasks and the endpoint.
The endpoint will be the URL that defines which type of resource we need to fetch from the API. Nothing special to remember; I find it more practical to have a variable that indicates the URL once rather than having to redefine it at each API call.
This array of tasks will be our source of truth regarding the state of tasks in our application. We will use it to list, filter, or even edit them.
The mutations, getters, and actions will interact with this array of tasks to modify its state and retrieve its information.
Mutations
First of all, a mutation is the only way to modify the data in the state. Indeed, with Vuex, we must define as many mutations as necessary to perform the modifications that will be made available in the application.
In our case, we will simply create mutations that will modify a classic array using JavaScript's native methods.
const mutations = {
  setTasks(state, tasks) {
    state.tasks = tasks
  },

  addTask(state, task) {
    state.tasks.push(task)
  },

  updateTask(state, task) {
    const taskId = task.id
    state.tasks.splice(
      state.tasks.findIndex((task) => task.id === taskId),
      1,
      task,
    )
  },

  removeTask(state, task) {
    const taskId = task.id
    state.tasks.splice(
      state.tasks.findIndex((task) => task.id === taskId),
      1,
    )
  },

  clearTasks(state) {
    state.tasks = []
  },
}
Thus, I've created mutations corresponding to classic modifications like adding, deleting, or updating a task. We notice that all our mutations take the state as the first argument.
By the way, I'd like to revisit updating an element in an array because Vuex uses Vue's reactivity to function, and there are some things to know. Due to certain limitations in JavaScript, we must use methods on arrays so that Vue detects changes and updates the DOM accordingly.
For example, to update a task in my array, I must use the splice method, which will remove an element at a given index or replace it with a new element passed as a third argument at the same index.
To perform a mutation, we will have to commit by choosing the name of the action to perform.
For example, if I want to add a task to my array, I can do:
let task = {
  title: "A newly created task",
}

commit("addTask", task)
And my task will then be available in my array, and all elements that use the store will be able to use it.
Thus, the following loop in another component will then be automatically updated:
<li v-for="task in this.$store.state.tasks"></li>Since the behavior of a state is very similar to that of Computed Properties, we can map the Vuex state to the classic computed methods of a component:
import { mapState } from "vuex"

export default {
  // ...

  computed: {
    ...mapState(["tasks"]),
  },

  // ...
}
And we can then do:
<li v-for="task in this.tasks"></li>Getters
Getters are methods that will use the Vuex state to return processed or filtered information according to a specific need.
It's very practical for display or sorting, keeping logic in a single place in our code to reuse in our different components later.
const getters = {
  filteredTasks: (state, getters) => (status) => {
    if (status === "completed") {
      return getters.completedTasks
    } else if (status === "active") {
      return getters.activeTasks
    }

    return getters.allTasks
  },

  allTasks(state) {
    return state.tasks
  },

  activeTasks(state) {
    return state.tasks.filter((task) => task.is_completed === false)
  },

  completedTasks(state) {
    return state.tasks.filter((task) => task.is_completed === true)
  },

  timeToChill: (state, getters) => (status) => {
    return (
      !state.tasks.length ||
      (status === "active" && !getters.activeTasks.length) ||
      (status === "completed" && !getters.completedTasks.length)
    )
  },
}
We do not modify the state in a getter, as it's impossible to do so. We simply return data that has undergone processing. Getters are sensitive to Vue's reactivity, so it's perfect.
We can pass parameters to them to add additional options.
To list all my active tasks in my application, I just need to do:
export default {
  computed: {
    activeTasks() {
      return this.$store.getters.activeTasks
    },
  },
}
As with mapState, we can use mapGetters and thus simplify our code:
import { mapGetters } from "vuex"

export default {
  // ...

  computed: {
    ...mapGetters(["allTasks", "activeTasks", "completedTasks"]),
  },

  // ...
}
And I can use this.completedTasks completely transparently using Vuex.
Actions
Actions are similar to mutations, but they do not change the state. Therefore, it is the actions that we will call in our application that will have their own business logic and will commit the mutations.
It is also with actions that we will be able to manage our asynchronous requests that will update the state via mutations.
We are starting to see the entire workflow that Vuex brings us through these different concepts.
Before going further, we can summarize the role of each part.
A state simply represents the state of our application at a given moment. The state is then the source of truth about the data in our application.
We can modify the state only with mutations and retrieve values with getters. Mutations and getters can define several different ways to interact with the state, depending on the application's needs.
Finally, actions represent the logic of our application that will handle making asynchronous requests and committing mutations for us.
In our case, I will use actions exclusively to make asynchronous requests and commit mutations based on the result obtained. Similarly, I must be able to use the return of these requests directly in my components if necessary.
Let's take the example of the action that will add a task:
const actions = {
  addTask({ commit }, params) {
    return axios
      .post(state.endpoint, params)
      .then(({ data }) => {
        commit("addTask", data.data)
        return data.data
      })
      .catch((error) => {
        return Promise.reject(error)
      })
  },
}
We notice that in the first parameter, we use destructuring to retrieve only the commit method. Indeed, in an action, Vuex automatically passes us the context of the instance, but we will only use the commits. This avoids having to do context.commit each time.
We can also pass optional parameters, such as form data.
In our action, we will directly return the Axios call because it returns a Promise directly. There are several advantages to doing this.
First, depending on the returned HTTP code, we can commit different actions but also send information to the components while keeping the behavior of a promise.
To do this, when an error is detected, we will reject the promise with return Promise.reject(error), and in case of success, we will simply return the data sent by the API. Thus, when calling an action, we can use the then or catch methods as if the call had been made without action but from the component directly with Axios.
To call an action, we must use the this.$store.dispatch method with the name of the method to use and any parameters.
export default {
  // ...
  methods: {
    addTask() {
      this.$store.dispatch("addTask", {
        title: "A newly created task",
        due_at: moment().seconds(0),
      })
    },

    // ...
  },
}Since we returned an Axios promise, we can use then and catch after calling the action. Thus, depending on the result, I will be able to make changes specific to this component. For example:
export default {
  // ...
  methods: {
    addTask() {
      this.loading = true

      this.$store
        .dispatch("fetchTasks")
        .then((data) => {
          this.isLoading = false
          this.flashSuccess("Tasks loaded")
        })
        .catch((error) => {
          this.isLoading = false
          this.errors = error.response.data
        })
    },

    // ...
  },
}
It is important to know that if we had not done the return Promise.reject(error) in our Vuex action, then here the catch method would never be executed because it would not know if it's an error or not.
We can then do the same for all the actions we will need in our application.
Conclusion
We now have all the logic of task management in place with Vuex. I hope I have been clear on how we can use Vuex in a Single Page Application.
I strongly encourage you to browse the tasks components folder as well as the Vuex module dedicated to task management on the GitHub repository to have all the code in front of you.
If you have any questions or comments, the comments section is there for that.
Thank you!

